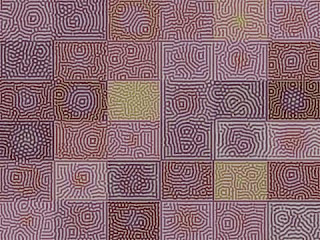
独特の不思議な模様を作れるチューリング・パターンを p5.js や Processing で描く、クリエイティブ・コーディングの解説記事です。
作り方のコツと共に、工夫次第でオリジナリティのある作品が作れるような、基本的な部分のみのサンプルコードと、それを使った応用例のコードも記載します。
👉 Read this article in English.
チューリング・パターンとは?
誤解を恐れずざっくり言うと、チューリング・パターンは熱帯魚の体表のような模様を数式によって描くものです。
その数式は、数学者アラン・チューリングによって研究された、反応拡散方程式と呼ばれるものです。
Wikipedia : チューリング・パターン
パターンを描くには多くの計算をこなす必要がありますが、そこはコンピュータの得意とするところ。クリエイティブ・コーディングならではの題材です。
p5.js の基本のコード
まずは p5.js で書いた基本となるコードを掲載します。
/*
 * Reaction-Diffusion system by the Gray-Scott Model.
 * basic example.
 *
 * @author @deconbatch
 * @version 0.1
 * p5.js 1.1.3
 * license CC0
 * created 2022.03.26
 */

const w = 480;
const h = w;
const cSiz = 3;   // cell size
const pCnt = 500; // calculation count

function setup() {
  createCanvas(w, h);
  noLoop();

  const lab = new Labo(cSiz);
  lab.init();
  for (let i = 0; i < pCnt; i++) {
    lab.proceed();
  }
  lab.observe();
}

/*
 * Labo : reaction-diffusion system.
 */
class Labo {

  cellSize;
  matrixW;
  matrixH;
  diffU;
  diffV;
  cells;

  constructor(_cSiz) {
    this.cellSize = _cSiz;
    this.matrixW = floor(width / this.cellSize);
    this.matrixH = floor(height / this.cellSize);
    this.diffU = 0.9;
    this.diffV = 0.1;
    this.cells = new Array();
  }

  /*
   * init : initialize reaction-diffusion system.
   */
  init() {
    for (let x = 0; x < this.matrixW; x++) {
      this.cells[x] = [];
      for (let y = 0; y < this.matrixH; y++) {
        this.cells[x][y] = new Cell(
          map(x, 0.0, this.matrixW, 0.03, 0.12),   // feed
          map(y, 0.0, this.matrixH, 0.045, 0.055), // kill
          1,                         // u
          (random(1) < 0.1) ? 1 : 0  // v
        );
      }
    }
  }

  /*
   * proceed : proceed reaction-diffusion calculation.
   */
  proceed() {

    // calculate Laplacian
    const nD = Array(); // neighbors on diagonal
    const nH = Array(); // neighbors on vertical and horizontal
    for (let x = 0; x < this.matrixW; x++) {
      for (let y = 0; y < this.matrixH; y++) {

        // set neighbors
        nD[0] = this.cells[max(x-1,0)][max(y-1,0)];
        nD[1] = this.cells[max(x-1,0)][min(y+1,this.matrixH-1)];
        nD[2] = this.cells[min(x+1,this.matrixW-1)][max(y-1,0)];
        nD[3] = this.cells[min(x+1,this.matrixW-1)][min(y+1,this.matrixH-1)];
        nH[0] = this.cells[max(x-1,0)][y];
        nH[1] = this.cells[x][max(y-1,0)];
        nH[2] = this.cells[x][min(y+1,this.matrixH-1)];
        nH[3] = this.cells[min(x+1,this.matrixW-1)][y];

        // Laplacian
        let c = this.cells[x][y];
        let sum = 0.0;
        for (let i = 0; i < 4; i++) {
          sum += nD[i].valU * 0.05 + nH[i].valU * 0.2;
        }
        sum -= c.valU;
        c.lapU = sum;

        sum = 0.0;
        for (let i = 0; i < 4; i++) {
          sum += nD[i].valV * 0.05 + nH[i].valV * 0.2;
        }
        sum -= c.valV;
        c.lapV = sum;

      }
    }

    // reaction-diffusion
    for (let x = 0; x < this.matrixW; x++) {
      for (let y = 0; y < this.matrixH; y++) {
        let c = this.cells[x][y];
        let reaction = c.valU * c.valV * c.valV;
        let inflow   = c.feed * (1.0 - c.valU);
        let outflow  = (c.feed + c.kill) * c.valV;
        c.valU = c.valU + this.diffU * c.lapU - reaction + inflow;
        c.valV = c.valV + this.diffV * c.lapV + reaction - outflow;
        c.standardization();
      }
    }
  }

  /*
   * observe : display the result.
   */
  observe() {
    background(0);
    fill(255);
    noStroke();
    for (let x = 0; x < this.matrixW; x++) {
      for (let y = 0; y < this.matrixH; y++) {
        let cx = x * this.cellSize;
        let cy = y * this.cellSize;
        let cs = this.cells[x][y].valU * this.cellSize;
        rect(cx, cy, cs, cs);
      }
    }
  }
}

/*
 * Cell : holds cell informations.
 */
class Cell {

  feed;
  kill;
  valU;
  valV;
  lapU;
  lapV;

  constructor(_f, _k, _u, _v) {
    this.feed = _f;
    this.kill = _k;
    this.valU = _u;
    this.valV = _v;
    this.lapU = 0;
    this.lapV = 0;
  }

  standardization() {
    this.valU = constrain(this.valU, 0, 1);
    this.valV = constrain(this.valV, 0, 1);
  }

}
※このコードを OpenProcessing で試される際は、ループプロテクションを外す必要があります。ご注意ください。
このコードは、Gray-Scott モデルと呼ばれる反応拡散系を実装したもので、方程式上のパラメータを xy 方向で変化させてみたものです。
コードの簡単な解説
class Labo で反応拡散系の計算を行います。計算のエリアは matrixW x matrixH のエリアで、そのマス目一つの情報を class Cell で表しています。cell[matrixW][matrixH] でエリア全体の情報を表せるわけです。
class Labo の init() でマス目全体の初期状態をセットします。proceed() では方程式を一回分計算しています。計算を何回繰り返すかは呼び出し元で制御します。
このコードは結構な計算量があり、実行にはそれなりの時間がかかります。計算時間は計算回数(pCnt)に比例し、セルサイズ(cSiz)を半分の値にすると、時間は 4倍になると思ってください。
私の環境では下記の値で約1分かかりました。
const cSiz = 3;   // cell size
const pCnt = 500; // calculation count
計算結果は cell の 2次元配列 this.cells[x][y] に入ります。この結果を元にして observe() で描画しています。
基本のコードはモノクロの描画ですが、結果を色に反映するなど、いろいろ工夫できると思います。
クリエイティブ・コーディング的、作り方のコツ
パラメータ調整
反応拡散方程式上のパラメータを変更するとパターンの種類が変わります。
基本のコードでは 4つのパラメータを、2箇所の部分で設定しています。 全て反応拡散方程式のパラメータで、diffU, diffV は固定値、feed, kill は x,y 座標の位置によってパラメータ値を変えています。
  // diffU, diffV
  this.diffU = 0.9;
  this.diffV = 0.1;

  // feed, kill
  this.cells[x][y] = new Cell(
    map(x, 0.0, this.matrixW, 0.03, 0.12),   // feed
    map(y, 0.0, this.matrixH, 0.045, 0.055), // kill
例えば、feed と kill をこの図の A, B 辺りのパラメータ値で固定して描画してみると、このように特徴の異なるパターンが現れます。
基本のコードの場合だと、特徴的なパターンを描くには、feed と kill の値を下記の範囲に収めるとよいと思います。
feed : 0.03 - 0.12
kill : 0.045 - 0.055
diffU, diffV も変更できますが、パターンが現れる条件はけっこうシビアです。
タネの配置
「タネの配置」というのは、V の値の配置です。基本のコードではランダムな位置に 1 を配置しています。
  this.cells[x][y] = new Cell(
    (random(1) < 0.1) ? 1 : 0    // v
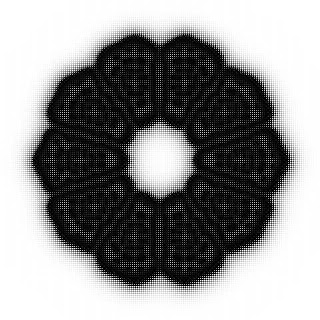
この配置の仕方で描画結果を大きく変えることができます。
基本のコードでは、class Labo の init() 中でセットするとよいでしょう。一旦全面を v = 0 にした後に、必要な部分のみ v = 1 をセットするのが簡単です。
// 先の円形の場合のコード例
for (let t = 0; t < TWO_PI; t += PI * 0.2) {
  let x = floor(this.matrixW * (0.5 + 0.25 * cos(t)));
  let y = floor(this.matrixW * (0.5 + 0.25 * sin(t)));
  this.cells[x][y].valV = 1;
}
計算回数やセルのサイズ
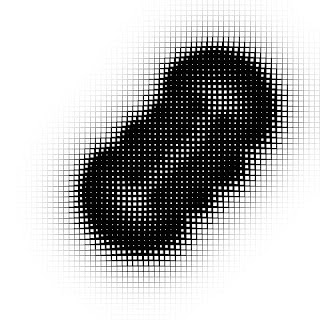
反応拡散方程式の計算回数や、セルのサイズを変えることでも模様は変わります。
const cSiz = 3;    // cell size
const pCnt = 1000; // calculation count
チューリング・パターンの応用例コード
紹介した作り方のコツをふまえた、クリエイティブ・コーディングの作例を紹介します。どちらも CC0 で公開します。ご自由にお使いください。
p5.js の作例
コードは、基本のコードの class Labo の init() を下記のように変えただけです。
  /*
   * init : initialize reaction-diffusion system.
   */
  init() {
    const hW = floor(this.matrixW * 0.5);
    const hH = floor(this.matrixH * 0.5);
    for (let x = 0; x < this.matrixW; x++) {
      this.cells[x] = [];
      for (let y = 0; y < this.matrixH; y++) {
        let d = dist(x, y, hW, hH);
        let f = map(sin(TWO_PI * d * 3 / hW), -1, 1, 0.12, 0.03);
        this.cells[x][y] = new Cell(
          f,     // feed
          0.045, // kill
          1,     // u
          0      // v
        );
      }
    }

    for (let t = 0; t < TWO_PI; t += PI * 0.2) {
      for (let r = 0.1; r < 0.4; r += 0.1) {
        let x = floor(this.matrixW * (0.5 + r * cos(t)));
        let y = floor(this.matrixW * (0.5 + r * sin(t)));
        this.cells[x][y].valV = 1;
      }
    }
  }
同じものの Processing の作例
こちらは、同様のプログラムを Processing で書いたものです。
/**
 * Reaction-Diffusion system by the Gray-Scott Model.
 * application example.
 *
 * @author @deconbatch
 * @version 0.1
 * Processing 3.5.3
 * license CC0
 * created 2022.03.26
 */

void setup() {
  size(480, 480);
  noLoop();

  int cSiz = 2;    // cell size
  int pCnt = 1000; // calculation count
  Labo lab = new Labo(cSiz);

  lab.init();
  for (int i = 0; i < pCnt; i++) {
    lab.proceed();
  }
  lab.observe();
}

/*
 * Labo : reaction-diffusion system.
 */
public class Labo {
  int cellSize;
  int matrixW;
  int matrixH;
  float diffU;
  float diffV;
  Cell[][] cells;

  Labo(int _cSiz) {
    cellSize = _cSiz;
    matrixW =  floor(width / cellSize);
    matrixH = floor(height / cellSize);
    diffU = 0.9;
    diffV = 0.1;
    cells = new Cell[matrixW][matrixH];
  }

  /*
   * init : initialize reaction-diffusion system.
   */
  void init() {
    float hW = matrixW * 0.5;
    float hH = matrixH * 0.5;
    for (int x = 0; x < matrixW; x++) {
      for (int y = 0; y < matrixH; y++) {
        float d = dist(x, y, hW, hH);
        float f = map(sin(TWO_PI * d * 3.0 / hW), -1.0, 1.0, 0.03, 0.12);
        cells[x][y] = new Cell(
                               f,     // feed
                               0.045, // kill
                               1.0,   // u
                               0.0    // v
                               );
      }
    }

    for (float t = 0.0; t < TWO_PI; t += PI * 0.2) {
      for (float r = 0.1; r < 0.4; r += 0.1) {
        int x = floor(matrixW * (0.5 + r * cos(t)));
        int y = floor(matrixW * (0.5 + r * sin(t)));
        cells[x][y].setV(1.0);
      }
    }
  }

  /*
   * proceed : proceed reaction-diffusion calculation.
   */
  void proceed() {
    for (int x = 0; x < matrixW; x++) {
      for (int y = 0; y < matrixH; y++) {

        // neighbors on diagonal
        Cell[] nD = new Cell[4];
        nD[0] = cells[max(x-1,0)][max(y-1,0)];
        nD[1] = cells[max(x-1,0)][min(y+1,matrixH-1)];
        nD[2] = cells[min(x+1,matrixW-1)][max(y-1,0)];
        nD[3] = cells[min(x+1,matrixW-1)][min(y+1,matrixH-1)];

        // neighbors on vertical and horizontal
        Cell[] nH = new Cell[4];
        nH[0] = cells[max(x-1,0)][y];
        nH[1] = cells[x][max(y-1,0)];
        nH[2] = cells[x][min(y+1,matrixH-1)];
        nH[3] = cells[min(x+1,matrixW-1)][y];

        // lapU
        Cell c = cells[x][y];
        float sum = 0.0;
        for (int i = 0; i < 4; i++) {
          sum += nD[i].getU() * 0.05 + nH[i].getU() * 0.2;
        }
        sum -= c.getU();
        c.setLapU(sum);

        // lapV
        sum = 0.0;
        for (int i = 0; i < 4; i++) {
          sum += nD[i].getV() * 0.05 + nH[i].getV() * 0.2;;
        }
        sum -= c.getV();
        c.setLapV(sum);

      }
    }

    // reaction-diffusion
    for (int x = 0; x < matrixW; x++) {
      for (int y = 0; y < matrixH; y++) {
        Cell c = cells[x][y];
        float reaction = c.getU() * c.getV() * c.getV();
        float inflow   = c.getFeed() * (1.0 - c.getU());
        float outflow  = (c.getFeed() + c.getKill()) * c.getV();
        c.setU(c.getU() + diffU * c.getLapU() - reaction + inflow);
        c.setV(c.getV() + diffV * c.getLapV() + reaction - outflow);
        c.standardization();
      }
    }
  }

  /*
   * observe : display the result.
   */
  void observe() {
    background(0);
    fill(255);
    noStroke();
    for (int x = 0; x < matrixW; x++) {
      for (int y = 0; y < matrixH; y++) {
        int cx = x * cellSize;
        int cy = y * cellSize;
        float cs = cells[x][y].getU() * cellSize;
        rect(cx, cy, cs, cs);
      }
    }
  }


}


/**
 * Cell : hold the informations of the cell.
 */
public class Cell {

  private float feed;
  private float kill;
  private float valU;
  private float valV;
  private float lapU;
  private float lapV;

  Cell(float _f, float _k, float _u, float _v) {
    feed = _f;
    kill = _k;
    valU = _u;
    valV = _v;
    lapU = 0.0;
    lapV = 0.0;
  }

  public void setLapU(float _l) {
    lapU = _l;
  }

  public void setLapV(float _l) {
    lapV = _l;
  }

  public void setU(float _u) {
    valU = _u;
  }

  public void setV(float _v) {
    valV = _v;
  }

  public float getFeed() {
    return feed;
  }

  public float getKill() {
    return kill;
  }

  public float getU() {
    return valU;
  }

  public float getV() {
    return valV;
  }

  public float getLapU() {
    return lapU;
  }

  public float getLapV() {
    return lapV;
  }

  public void standardization() {
    valU = constrain(valU, 0.0, 1.0);
    valV = constrain(valV, 0.0, 1.0);
  }

}
参考になる本、サイト
チューリング・パターンだけでなく、ボイドやセルラー・オートマトンなども掲載されている本です。クリエイティブ・コーディングのネタとして大いに参考になります。
コード例は Python ですが、考え方はどの言語でも同じだし、Python のコードを見て Processing や p5.js に書き直してみるのもよい訓練になるのではないでしょうか。
拡散方程式の理解のためにはこちらのサイトを紹介します。
processingの備忘録 -チューリングパターン- - プログラミングの備忘録


