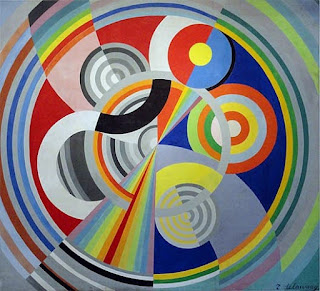
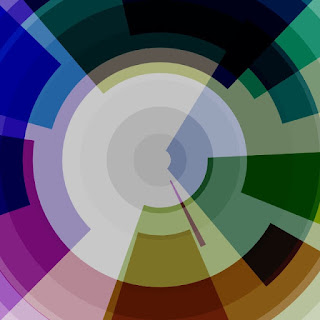
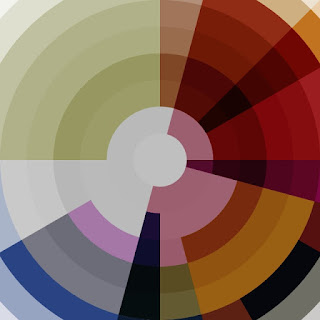
抽象絵画のパイオニアであるロベール・ドローネーは、数々の魅力的な作品を残してくれた、私の好きな画家の一人です。
ドローネーの絵画にインスピレーションを得て、円と円弧を使った作品を作ってみます。
👉 Read this article in English.
同心円上にランダムな円弧を重ねる
まずは濃淡を付けたグレーで同心円を描きます。
そこに、このような円弧をいくつかランダムに描きます。
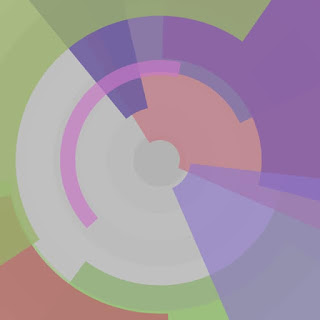
同心円の上にランダムな円弧を重ねた図がこちらです。円弧に透明度を持たせています。
blendMode(BURN) で円弧を重ねると風合いが変わります。
p5.js のコード例
/**
 * ロベール・ドローネーにあこがれて
 * 円弧をランダムに配置
 *
 * @author @deconbatch
 * @version 0.1
 * @license CC0
 * p5.js 1.5.0
 * created 2023.02.15
 */

const w = 640;
const h = w;
const circleNum = 9;
const arcNum = 8;
const baseR = w * 1.3;

function setup() {
  createCanvas(w, h);
  colorMode(HSB, 360, 100, 100, 100);
  noLoop();
}

function draw() {
  translate(w * 0.5, h * 0.5);

  blendMode(BLEND);
  background(0, 0, 100, 100);

  // 同心円
  blendMode(BLEND);
  noStroke();
  for (let cCnt = 0; cCnt < circleNum; cCnt++) {
    fill(0, 0, random(60, 80), random(60));
    circle(0, 0, baseR * (circleNum - cCnt) / circleNum);
  }

  // 円弧
  blendMode(BURN);
  noFill();
  strokeCap(SQUARE);
  for (let aCnt = 0; aCnt < arcNum; aCnt++) {
    let arcR = random(baseR);
    let arcW = random(baseR);
    let tFr = random(TWO_PI);
    let tTo = tFr + random(PI);

    strokeWeight(arcW);
    stroke(random(360), 40, random(60, 80), random(60, 100));
    arc(
      0.0, 0.0,
      arcR + arcW, arcR + arcW,
      tFr, tTo
    );
  }

}

function mouseClicked() {
  redraw();
}
円弧は arc() を使って描いています。fill() は使わず、strokeWeight() で幅を設定した stroke()、つまり太い線で描いています。
strokeCap(SQUARE) が円弧らしい円弧を描くポイントです。
これが strokeCap(PROJECT) だと指定した角度からちょっとはみ出してしまいます。
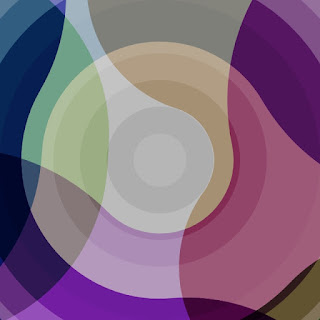
strokeCap() 無し、あるいは strokeCap(ROUND) だとこうなります。
でも、これはこれで面白いかもしれません。
重なりをコントロール
前述のコード例では、円弧の半径、幅、角度を全てランダムに決定していました。これだと円弧同士や下塗りの同心円との重なりがやかましく、面白味が薄く感じられます。
そこで、円弧の半径と幅の単位を、下塗りの同心円の幅の単位と合わせます。
// let arcR = random(baseR);
// let arcW = random(baseR);
   let arcR = baseR * floor(random(1, circleNum)) / circleNum;
   let arcW = baseR * floor(random(1, circleNum)) / circleNum;
円弧の開始と終了の角度も、無段階ではなく 24分割などの決まった単位で分割します。
// let tFr = random(TWO_PI);
// let tTo = tFr + random(PI);
   let tFr = TWO_PI * floor(random(24)) / 24;
   let tTo = tFr + PI * floor(random(1, 13)) / 12;
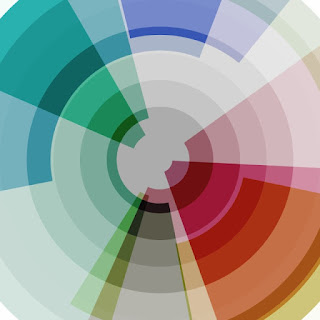
これで重なりが単位ごとになり、ごちゃつきが無くなってスッキリとした仕上がりになります。
最終的な作例コードの p5.js版 と Processing版を掲載します。
p5.js の作品コード
/**
 * ロベール・ドローネーにあこがれて
 * 円弧のサイズや配置をある単位ごとに区切る
 *
 * @author @deconbatch
 * @version 0.1
 * @license CC0
 * p5.js 1.5.0
 * created 2023.02.15
 */

const w = 640;
const h = w;
const circleNum = 9;
const arcNum = 8;
const baseR = w * 1.3;

function setup() {
  createCanvas(w, h);
  colorMode(HSB, 360, 100, 100, 100);
  noLoop();
}

function draw() {
  translate(w * 0.5, h * 0.5);

  blendMode(BLEND);
  background(0, 0, 100, 100);

  // 同心円
  blendMode(BLEND);
  noStroke();
  for (let cCnt = 0; cCnt < circleNum; cCnt++) {
    fill(0, 0, random(60, 80), random(60));
    circle(0, 0, baseR * (circleNum - cCnt) / circleNum);
  }

  // 円弧
  blendMode(BURN);
  noFill();
  strokeCap(SQUARE);
  for (let aCnt = 0; aCnt < arcNum; aCnt++) {
    let arcR = baseR * floor(random(1, circleNum)) / circleNum;
    let arcW = baseR * floor(random(1, circleNum)) / circleNum;
    let tFr = TWO_PI * floor(random(24)) / 24;
    let tTo = tFr + PI * floor(random(1, 13)) / 12;

    strokeWeight(arcW);
    stroke(random(360), 40, random(60, 80), random(60, 100));
    arc(
      0.0, 0.0,
      arcR + arcW, arcR + arcW,
      tFr, tTo
    );
  }

}

function mouseClicked() {
  redraw();
}
Processing の作品コード
/**
 * ロベール・ドローネーにあこがれて
 * 円弧のサイズや配置をある単位ごとに区切る
 *
 * @author @deconbatch
 * @version 0.1
 * @license CC0
 * Processing 3.5.3
 * created 2023.02.15
 */

public void setup() {
 	size(640, 640);
  colorMode(HSB, 360.0, 100.0, 100.0, 100.0);
  smooth();
  noLoop();

  int   circleNum = 9;
  int   arcNum    = 8;
  float baseR     = width * 1.3;

  translate(width * 0.5, height * 0.5);

  blendMode(BLEND);
  background(0.0, 0.0, 100.0, 100.0);

  // 同心円
  blendMode(BLEND);
  noStroke();
  for (int cCnt = 0; cCnt < circleNum; cCnt++) {
    fill(0.0, 0.0, random(60.0, 80.0), random(60.0));
    circle(0.0, 0.0, baseR * (circleNum - cCnt) * 1.0 / circleNum);
  }

  // 円弧
  blendMode(SUBTRACT);
  noFill();
  strokeCap(SQUARE);
  for (int aCnt = 0; aCnt < arcNum; aCnt++) {
    float arcR = baseR * floor(random(1, circleNum)) * 1.0 / circleNum;
    float arcW = baseR * floor(random(1, circleNum)) * 1.0 / circleNum;
    float tFr = TWO_PI * floor(random(24)) / 24.0;
    float tTo = tFr + PI * floor(random(1, 13)) / 12.0;

    strokeWeight(arcW);
    stroke(random(360.0), 40.0, random(60.0, 80.0), random(60.0, 100.0));
    arc(
        0.0, 0.0,
        arcR + arcW, arcR + arcW,
        tFr, tTo
        );
  }

}
工夫の余地あります
垂直線、水平線、対角線上に円弧の端を持ってくると、構図的に良いものが出来る気がします。
そのようにある程度恣意的に構図をコントロールしたり、今回完全にランダムにしている色相の決め方を変えてみるなど、このコードにはいろいろと工夫して楽しむ余地があります。良かったら、改造して遊んでみてください。

