画像処理とは
画像処理とは、画像から情報を取り出したり、画像の大きさや色合いを変えたりする処理のことです。イメージプロセッシングとも呼ばれます。
色を反転したり、コントラストを上げたりなども画像処理のひとつですが、Processing を使うことで面白い独創的な効果を自分で作ることが可能です。
オリジナル画像はシカゴ美術館より。
Vincent van Gogh "Self-Portrait"
CC0 Public Domain Designation
今回作る画像処理プログラム
今回は以下の動機から、写真を元にサークルパッキングでお花を並べるという画像処理プログラムを作ります。
- キャンバスにお花がいっぱい並んだら楽しいな
- 無作為に並べるのもいいけど、写真を元に配置してみよう
Processing のコード例と解説
今回 Processing で作ったプログラムのコード全体がこちらです。
GPL で公開しています。GPLの条項に基づいてご自由にお使いください。
/**
 * サークルパッキングの手法を用いた画像処理
 * キャンバスに花を咲かせましょう
 *
 * @author @deconbatch
 * @version 0.1
 * @license GPL Version 3 http://www.gnu.org/licenses/
 * Processing 3.5.3
 * 2021.07.31
 */

void setup() {
  size(980, 980); // 正方形であること
  colorMode(HSB, 360.0, 100.0, 100.0, 100.0);
  smooth();
  noLoop();
}

void draw() {

  PImage img = loadImage("original.png"); // 処理元画像 ./data/original.png

  int caseWidth  = 30; // 外枠の幅
  int baseCanvas = width - caseWidth * 2;
  int gridDiv    = floor(width / 90.0);  // グリッドサイズ

  // 元画像のサイズ調整
  float rateSize = baseCanvas * 1.0 / max(img.width, img.height);
  img.resize(floor(img.width * rateSize), floor(img.height * rateSize));
  println(int(img.width) + caseWidth * 2);
  println(int(img.height) + caseWidth * 2);

  // グリッド配置のサークルパッキング
  ArrayList<PVector> grid = getGrid(img, gridDiv);
  ArrayList<Flower> flowers = getFlower(
                                        img,
                                        grid,
                                        gridDiv * 0.5,
                                        gridDiv * 3.0
                                        );

  // 描画
  translate((width - img.width) / 2, (height - img.height) / 2);
  background(0.0, 0.0, 90.0, 100.0);
  for (Flower f : flowers) {
    f.draw();
  }
  casing(caseWidth, img.width, img.height);
  saveFrame("frames/im0001.png");

  exit();

}

/**
 * getGrid : グリッド配置の座標を PVector の ArrayList で返す
 */
private ArrayList<PVector> getGrid(PImage _img, int _step) {

  ArrayList<PVector> ps = new ArrayList<PVector>();
  int start = floor(_step * 0.5);

  for (int x = start; x < _img.width; x += _step) {
    for (int y = start; y < _img.height; y += _step) {
      ps.add(new PVector(x, y));
    }
  }

  return ps;
}

/**
 * getFlower : サークルパッキングの手法で、 _ps で与えられた座標上の
 * どこかにお花を配置し、それを Flower の ArrayList にして返す
 * サークルパッキングは成長なしのランダム配置のみ
 */
private ArrayList<Flower> getFlower(
                                    PImage _img,
                                    ArrayList<PVector> _ps,
                                    float _minSize,  // お花の最小サイズ
                                    float _maxSize   // 同最大サイズ
                                    ) {

  int tryMax = 50000; // お花を配置する試行回数

  ArrayList<Flower> flowers = new ArrayList<Flower>();
  _img.loadPixels();

  for (int tryCnt = 0; tryCnt < tryMax; tryCnt++) {
    PVector p = _ps.get(floor(random(_ps.size())));
    float pSize = random(_minSize, _maxSize);
    Boolean collision = false;
    for (Flower f : flowers) {
      if (dist(f.x, f.y, p.x, p.y) < (f.r + pSize) * 0.5) {
        collision = true;
        break;
      }
    }
    if (!collision) {
      int pix = floor(p.y * _img.width + p.x);
      flowers.add(new Flower(
                             p.x,
                             p.y,
                             pSize,
                             hue(_img.pixels[pix]),
                             saturation(_img.pixels[pix]),
                             brightness(_img.pixels[pix])
                             ));
    }
  }
  return flowers;
}

/**
 * casing : 外枠を描画
 */
private void casing(int _casing, float _w, float _h) {
  rectMode(CORNER);
  fill(0.0, 0.0, 0.0, 0.0);
  strokeWeight(_casing + 4.0);
  stroke(0.0, 0.0, 30.0, 100.0);
  rect(-_casing * 0.5, -_casing * 0.5, _w + _casing, _h + _casing);
  strokeWeight(_casing);
  stroke(0.0, 0.0, 100.0, 100.0);
  rect(-_casing * 0.5, -_casing * 0.5, _w + _casing, _h + _casing);
}

/**
 * Flower : お花一つの情報を保持、その情報を元につつましく描画
 */
public class Flower {

  private float x, y;     // 座標
  private float r;        // サイズ
  private float elpVal;   // 花びら幅のサイズ率
  private float hueVal;   // 色相
  private float satVal;   // 彩度
  private float briVal;   // 明度
  private float tooSmall = 10.0; // あまりにも小さい花は省略描画

  Flower(float _x, float _y, float _r, float _hue, float _sat, float _bri) {
    x = _x;
    y = _y;
    r = _r;
    elpVal = random(0.1, 0.5);
    hueVal = _hue;
    satVal = _sat;
    briVal = constrain(_bri, 0.0, 90.0);
  }

  public void draw() {

    float shortR   = r * elpVal;
    float petalDiv = PI / (ceil(random(1.0, 5.0)) * 2.0);

    pushMatrix();
    translate(x, y);
    rotate(random(PI));

    noStroke();
    fill(hueVal % 360.0, satVal, briVal, 100.0);
    for (float t = 0.0; t < PI; t += petalDiv) {
      rotate(t);
      ellipse(0.0, 0.0, r, shortR);
    }

    if (r < tooSmall) {
      strokeWeight(0.1);
    } else {
      strokeWeight(1.0);
    }
    stroke(0.0, 0.0, 90.0, 30.0);
    noFill();
    for (float t = 0.0; t < PI; t += petalDiv) {
      rotate(t);
      ellipse(0.0, 0.0, r, shortR);
    }

    if (r > tooSmall) {
      strokeWeight(shortR * 0.2);
      stroke((hueVal + 330.0) % 360.0, satVal, briVal, 100.0);
      fill((hueVal + 30.0) % 360.0, satVal, briVal, 100.0);
      ellipse(0.0, 0.0, shortR, shortR);
    }

    popMatrix();

  }

}

/*
Copyright (C) 2021- deconbatch

This program is free software: you can redistribute it and/or modify
it under the terms of the GNU General Public License as published by
the Free Software Foundation; either version 3 of the License, or
(at your option) any later version.

This program is distributed in the hope that it will be useful,
but WITHOUT ANY WARRANTY; without even the implied warranty of
MERCHANTABILITY or FITNESS FOR A PARTICULAR PURPOSE.  See the
GNU General Public License for more details.

You should have received a copy of the GNU General Public License
along with this program.  If not, see <http://www.gnu.org/licenses/>
*/
結果例はこちら。
お花の形を作るコード
お花を描くコードは Flower クラスの draw メソッドにあります。
楕円を複数回、少しずつ回転させながら描くことで花びらを表現しています。
1回転の分割数を大きくすると多くの花びら、小さくすると少ない花びらのお花になります。
float petalDiv = PI / (ceil(random(1.0, 5.0)) * 2.0);
大事なのは ceil() で整数化しているように、分割数を割り切れる数にしないと歪んだお花になってしまうところです。
元写真の色を取得する部分のコード
お花をキャンバス上に置く上で、元写真の色を元にしてお花の色を決めています。
そのコードが getFlower 中のこの部分です。
_img.loadPixels();
...省略...
int pix = floor(p.y * _img.width + p.x);
flowers.add(new Flower(
                       p.x,
                       p.y,
                       pSize,
                       hue(_img.pixels[pix]),
                       saturation(_img.pixels[pix]),
                       brightness(_img.pixels[pix])
                       ));
_img が元写真です。
loadPixels() することにより、pixels[座標のインデックス]で元写真上の座標の情報を読むことができます。
ここでは hue(色相)、saturation(彩度)、brightness(明度)を読んで、それをお花の色にセットしています。
この loadPixels() と pixels[] が Processing での画像処理でよく使うお決まりのパターンです。
グリッド配置でポジショニング
お花はランダム配置でもいいんですが、ある程度の整列感があったほうが気持ちいいので、グリッド配置を取り入れてみます。
違いはこのとおり。
コードではグリッド配置した座標を ArrayList に入れ、それを getFlower に渡しています。
ArrayList<PVector> grid = getGrid(img, gridDiv);
ArrayList<Flower> flowers = getFlower(
                                      img,
                                      grid,
                                      gridDiv * 0.5,
                                      gridDiv * 3.0
                                      );
getFlower では渡された ArrayList からランダムに座標を取り出して、それをお花の座標として使っています。
PVector p = _ps.get(floor(random(_ps.size())));
今回使ったサークルパッキングの手法
今回 getFlower の中で行っているサークルパッキングは、お花の大きさをランダムに指定し、もし他のお花と重ならない場合のみ配置するという方式にしました。
大きさを他と重ならないギリギリまで少しずつ大きくさせる「成長」のロジックは入れていません。
サークルパッキングについてはこちらの記事でも書いていますので、よろしければ参考までにご覧ください。
✅ 雰囲気のあるサークル・パッキングを作るテクニック
プルス・ウルトラ
元画像の大きさは事前に決まっていないので、キャンバスにピッタリ収まるように縦横サイズの調整をしています。
キャンバスは 980x980 の正方形にしてありますが、元画像も正方形とは限りません。なので、縦長の元画像だと左右に空きが出ます。
元画像の縦横比は様々なので、長辺がキャンバスに収まる大きさにサイズ調整をしています。そして、装飾の外枠を含めた調整後のサイズをコンソールに出力するようにしています。
println(int(img.width) + caseWidth * 2);
println(int(img.height) + caseWidth * 2);
これをシェルスクリプトで取得して ImageMagick 等でサイズ通りに切り取るようにすることもできます。
私はそのやり方で Twitter ボットを作り、自動でイメージプロセッシングからツイートまでを実行させています。
DoMewno.
— deconbatch (@deconbatch) July 25, 2021
Cat from Molyvos {Lesbos}https://t.co/AGDc6h1tHa
Tried to draw with colors that do not exist. 🎲 https://t.co/dmnERILubF#cats #processing #creativecoding #OpenSource pic.twitter.com/Lj5TbTES9X
これはどんな画像を取ってきてどんな加工をするのか私も事前に知らないので、毎回見るのが楽しみなのです。
私の理想の画像処理
私の求める画像処理プログラミングは「元の写真に効果を加える」というタイプのものではありません。
元の写真をデータとして捉え、「データを加工して新しい絵を作り出す」というところを目指して作っています。
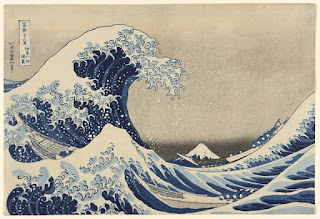
オリジナル画像はシカゴ美術館より。
葛飾 北斎 "神奈川沖浪裏"
CC0 Public Domain Designation
なんて、偉そうなこと言って、まだ全然出来てないんですけどね。
もし、こういうのが「面白い」と思える方なら、下記も楽しんでいただけるんじゃないかと思います。
✅ deconbatch のイメージプロセッシング


